Why / How… the red wash.

This was a technique that I was taught by fellow artist “Warren Haney” when I had lessons with him some years ago, and it is a technique that I really love to work with . Originally taught to me for the use in acrylic painting, it is still a technique that I use today with oil painting. In fact… I really wouldn’t know where to start without it!
WHY:
The red wash is done primarily over your sketch as the very first step to your painting process.
By brushing a streak free ‘tint’ over your sketch you are setting a ‘mid-tone’ to your work. From this mid-tone it is much much easier to begin the actual painting of your subject as all the lights are knocked back a tad.
Now you can start to ‘bring in’ or ‘paint in’ all the whites and lights in your painting. Set against the tinted background, this gives your painting a much more immediate ‘finished and rounded look, as the highlighted areas are really popping right off the canvas already! Using this technique also gives you a lot more feedback and a better suggestion of what your painting is going to look like when it is finished. I find it is much easier to stick to completing your painting when you love it at EVERY step, not just at the end!
ADDED BENEFITS:
Using the ‘red wash’ to underpaint your painting also seals in the graphite of your drawing so as not to stain the paint when you begin painting.
HOW:
After finishing your drawing, either on paper OR on canvas… prepare your ‘red wash’. For my red wash, I use a small dab of Pyrolle Red Aterlier paint, roughly enough to just cover the tip of your finger. Place paint into a high sided container. I then add Atelier clear painting medium. This medium is milky white, but dries clear. Add around 80 mls of the medium to the paint. The consistency should be such that when you spread the medium over a sketch with a brush, that you have a nice, light tint over your sketch and can still see all the details of your sketch clearly.
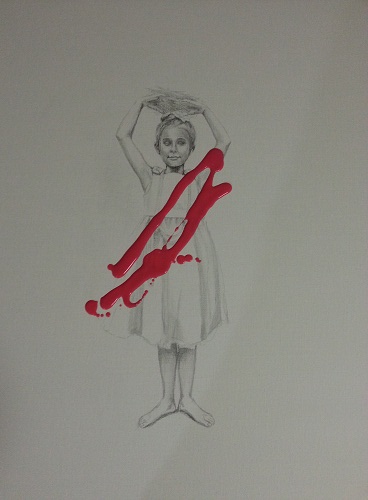
When mixed, pour the wash over your sketch… very dramatic… I know!
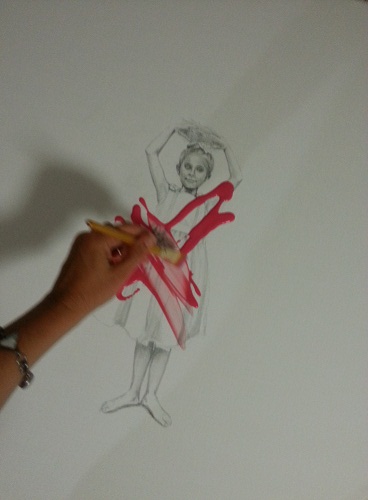
Using a soft and hopefully ‘streak free’ brush like a Hake… spread the tint over your entire sketch…

Don’t panic… but DO continue to spread the tint without stopping. If you allow this stuff to even partially dry before you finish it can get very gluggy and patchy!
Hint: the larger your brush, the less streaks. Continue until you have a beautiful even coverage of your tint.
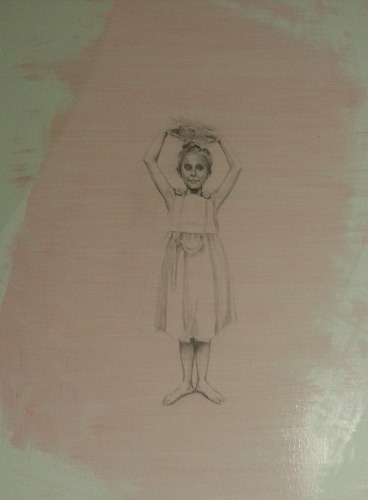
Eh VOILA!
A beautiful ‘red wash’ over your painting to seal in your drawing and create a perfect mid-tone from which you can paint.
NEXT:
Oh well, I guess you will have to wait for my next post! But in the mean time, I would love to hear how you go with this technique if you try it 🙂
Warm Regards,
Tara Spicer.
